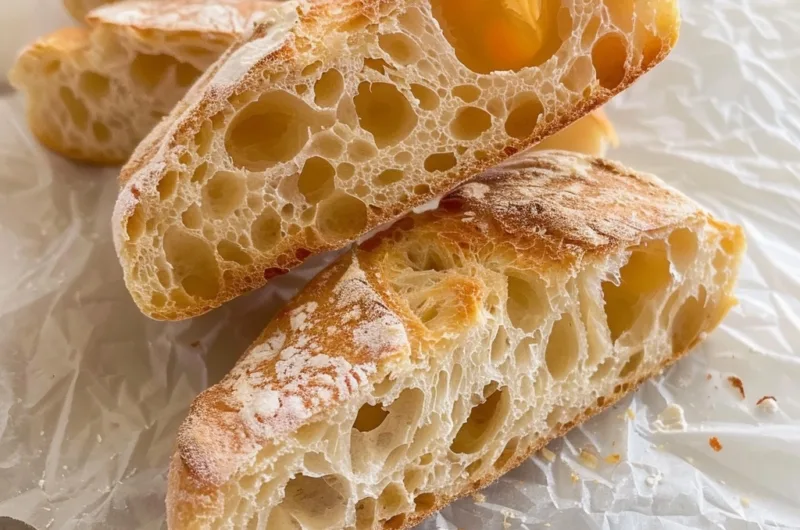
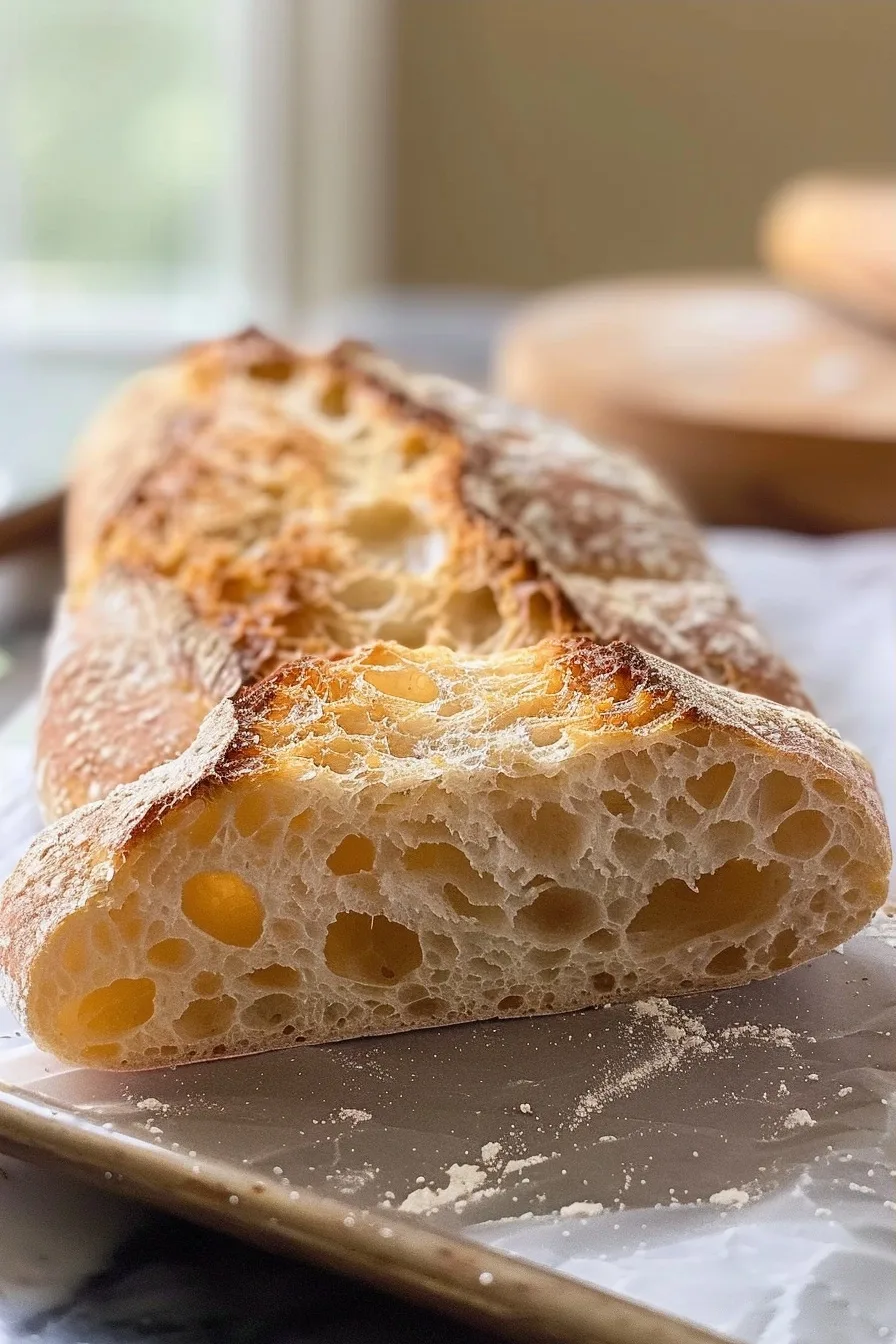
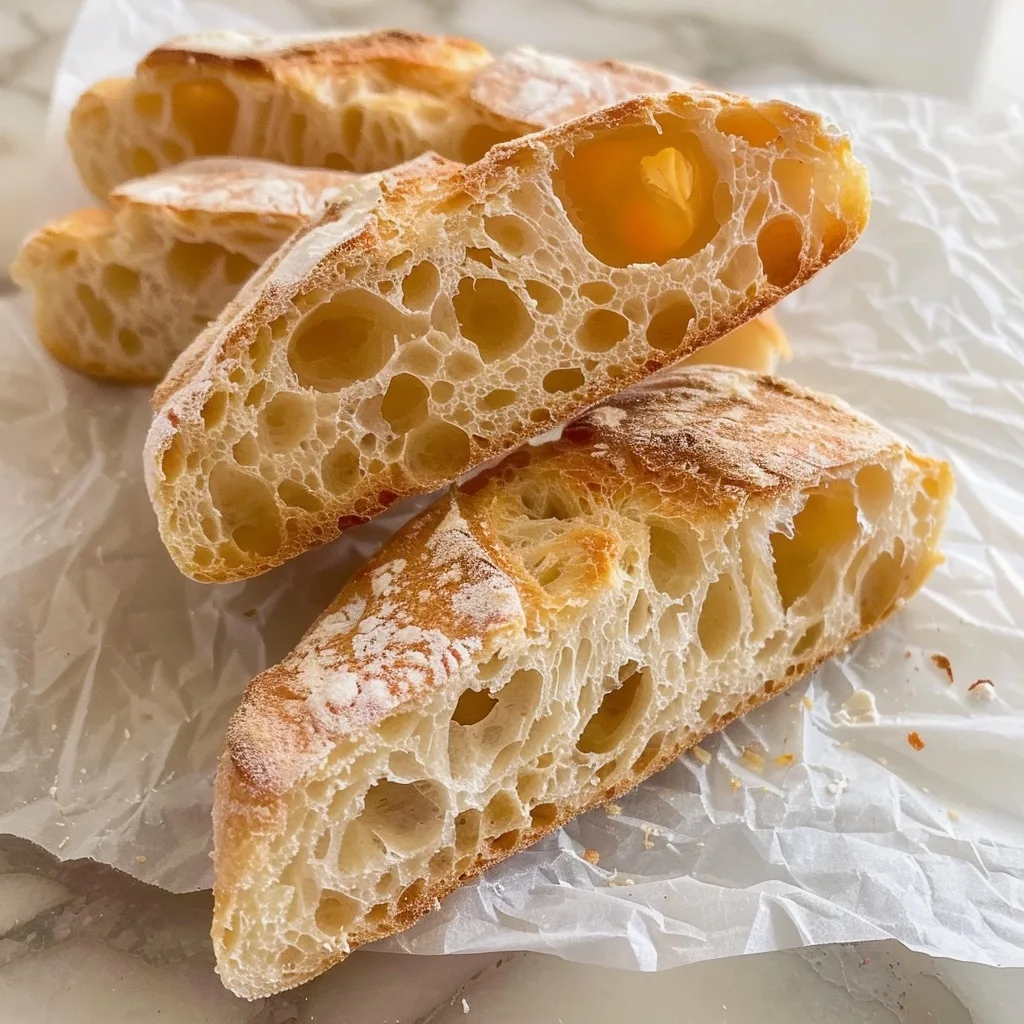
Bakery-Style No-Knead Ciabatta Bread delivers a crisp, crunchy crust and a chewy, open crumb that feels like a trip to an Italian kitchen. This loaf requires no kneading, just a long, relaxed fermentation and a short baking time that produces a professional result.
Why This Recipe Works
When I first experimented with no‑knead doughs, I was skeptical about achieving the characteristic ciabatta holes. The secret lies in the long, low‑temperature rise that develops gluten through movement rather than manual mixing. The result is a dough that stretches easily, creating wide, airy gaps without tearing the crust.
Another factor is the high water content—almost 70% relative to flour. This hydration keeps the dough moist and helps the gluten network stay relaxed, making the final bake yield a light, spongy interior that pairs perfectly with olive oil on the surface. The simple formula keeps flavors pure, letting the yeast punch, and the butter‑style olive oil add a subtle, mellow finish.
Ingredients
| Ingredient | Quantity | Notes / Alternatives |
|---|---|---|
| Warm Water (110°F) | 1 1/2 cups | Use filtered to avoid chlorine taste. Substitute unseasoned sparkling water for a lighter crumb. |
| All-Purpose Flour | 4 1/2 cups (570g) | Replace 1 cup with whole‑wheat for nutty flavor. Store flour in a cool, dry place. |
| Sea Salt | 2 teaspoons | Provides seasoning and gluten strengthening. Kosher salt can be used. |
| Instant Yeast | 1 teaspoon | Instant yeast rises quickly. Fresh yeast works, but increase to 1 1/4 teaspoons. |
| Olive Oil | 2 tablespoons | Choose extra‑virgin for best aroma. Flaxseed oil, if preferred, has a neutral taste. |
Step‑by‑Step Instructions
- Combine the warm water and yeast in a large bowl. Let sit 5 minutes until frothy.
- Mix the flour and salt in a separate container.
- Add the yeast mixture and olive oil to the dry mix, stirring until a shaggy dough forms.
- Rest the dough: cover tightly with plastic wrap or a damp lid and leave at room temperature for 18–24 hours. The loaf will double in size.
- Preheat the oven to 475°F (245°C) and place a 1‑inch thick baking stone or a cast‑iron dutch oven on the middle rack.
- Shape the dough by gently folding it over itself two or three times on a lightly floured surface; do not punch it. Transfer to a parchment‑lined tray.
- Bake for 30 minutes until the crust is dark peach and ears can crack the surface. Leave the oven door slightly ajar for steam.
- Cool the loaf on a wire rack for at least 20 minutes before slicing to allow the crumb to set.
Preparation Phase
During the preparation phase, the yeast is activated in warm water; then the dough catches up with the rest of the ingredients. The no‑knead technique relies heavily on correct hydration so the dough remains tacky but not too sticky.
Proofing Phase
The ambient temperature significantly impacts yeast activity. For estimates, a kitchen at 70°F (21°C) gives a rise time close to 18 hours; at a cooler 60°F (15°C), extend the period to up to 24 hours. The slow rise builds flavor and gluten structure.
Baking Phase
Begin with a known, high‑heat room. Transfer the dough on parchment so it slides easily during the final shaping. Be careful not to under‑bake; the cracks in the crust signal proper expansion.
Cooling Phase
Temperature shifts during cooling influence crispness. Let the loaf rest until it reaches a final internal temperature of 190°F (88°C), then word a short cool‑down period before slicing.
Chef Tips for Perfect Results
- Use a tightly sealed container; the yeast will produce gas that escapes otherwise, thinning the proof.
- Room temperature may vary; if the dough expands too quickly, increase the resting time to maintain structure.
- Preheat a baking stone or steel to keep the bottom rising fast, achieving a layered crust.
- Spray a fine mist of water just before closing the oven door to generate steam, enhancing crust puffy‑ness.
- During fermentation, lightly brush the dough’s surface with water to form a natural film, preventing an overly thick crust.
Common Mistakes to Avoid
- Overmixing the dough. Frequent shaking or patting tightens gluten, yielding a denser crumb. Mix only until ingredients bind.
- Under‑proofing. A loaf that hasn’t doubled will look flat and dense. Extend resting time or check temperature.
- Using too much flour during shaping. Too many grains will dry out the dough’s surface, leading to a brittle crust. Brush instead of powder.
- Opening the oven too early. Exposure to air curbs steam, producing a raw interior. Stay outside the oven until a 29‑31 minute interval.
- Storing in a sealed bag. Trapped moisture turns the crust soggy. Keep loaf on a rack until fully cooled.
Variations and Substitutions
| Ingredient | Substitution | Impact on Flavor |
|---|---|---|
| All‑Purpose Flour | Whole‑wheat flour (up to 1/3) | Bulkier texture, nuttier undertone. |
| Olive Oil | Avocado oil or neutral vegetable oil | Less olive aroma, slightly milder finish. |
| Instant Yeast | Fresh active dry yeast | Slower rise; fuller fermentation note. |
| Water | Boiled then cooled, or sparkling water | Reduced gas pockets for marble‑like crumb. |
| Sea Salt | Himalayan pink salt or no salt | Subtle mineral change, overall sweetness. |
Serving Suggestions and Pairings
Serve warm slices with a drizzle of premium olive oil, cracked pepper, and optional goat cheese. Perfect for rustic charcuterie boards during a summer picnic or as a base for antipasto sandwiches layered with marinated artichokes, sun‑dried tomatoes, and roasted red pepper spread. In winter, pair with a hearty tomato basil soup for comforting dinners.
Storage and Reheating
| Method | Duration | Instructions |
|---|---|---|
| Room Container | Up to 2 days | Wrap loosely in parchment; keep in a cool, dark place. |
| Refrigerated | Up to 4 days | Store in sealed plastic; reheat slices in a toaster oven at 350°F for 5 minutes. |
| Frozen | Up to 6 months | Wrap tightly, remove at slice level; thaw in fridge, then bake until crisp at 375°F for 12 minutes. |
Nutritional Information
| Nutrient | Amount per Serving (approx.) |
|---|---|
| Calories | 250 kcal |
| Protein | 7 g |
| Fat | 4 g |
| Carbohydrates | 45 g |
| Fiber | 2 g |
| Sugar | 1 g |
| Sodium | 410 mg |
Frequently Asked Questions
Can I swap the all-purpose flour for whole wheat?
With whole wheat, the dough will be denser. To retain airy texture, reduce whole wheat to 25% of total flour and add a teaspoon of vital wheat gluten.
When is the perfect baking moment?
The loaf is done when the internal temperature reaches 190°F (88°C). A dark, crackless crust confirms doneness.
What if the dough smells sour?
Sourness indicates an over‑fermented dough; try cutting the resting period in half to avoid acidity buildup.
Is it possible to store leftovers?
Yes, keep the loaf at room temperature wrapped loosely for 1–2 days or freeze slices for longer durations. Always reheat before serving.
Can I add herbs or seeds during proofing?
Yes, scatter rosemary or sesame seeds lightly over the surface before the final shaping; they will bake into the crust, adding texture and aroma.
Conclusion
Bakery-Style No-Knead Ciabatta Bread combines simplicity, tradition, and bold flavors in one loaf. Follow these steps, and you’ll enjoy a rustic product that rivals professional shops, bringing authentic Italian comfort into your home kitchen.
Bakery-Style No-Knead Ciabatta Bread
Ingredients
Method
- Combine warm water and yeast in a large bowl. Let sit 5 minutes until frothy
- Mix flour and salt in a separate container
- Add yeast mixture and olive oil to dry ingredients to form shaggy dough
- Rest dough for 18–24 hours at room temperature, covered
- Preheat oven to 475°F (245°C) and place baking stone or cast-iron dutch oven on middle rack
- Gently fold dough on floured surface 2-3 times and transfer to parchment-lined tray
- Bake 30 minutes until crust is dark peach
- Cool on wire rack for at least 20 minutes
Notes
Substitute 1 cup flour with whole-wheat for nutty flavor
Replace olive oil with flaxseed oil for neutral taste
Sparkling water replaces still water for lighter crumb
Adjust baking time if using dutch oven